This page may contain affiliate links.
Read our disclosure and privacy policy here.
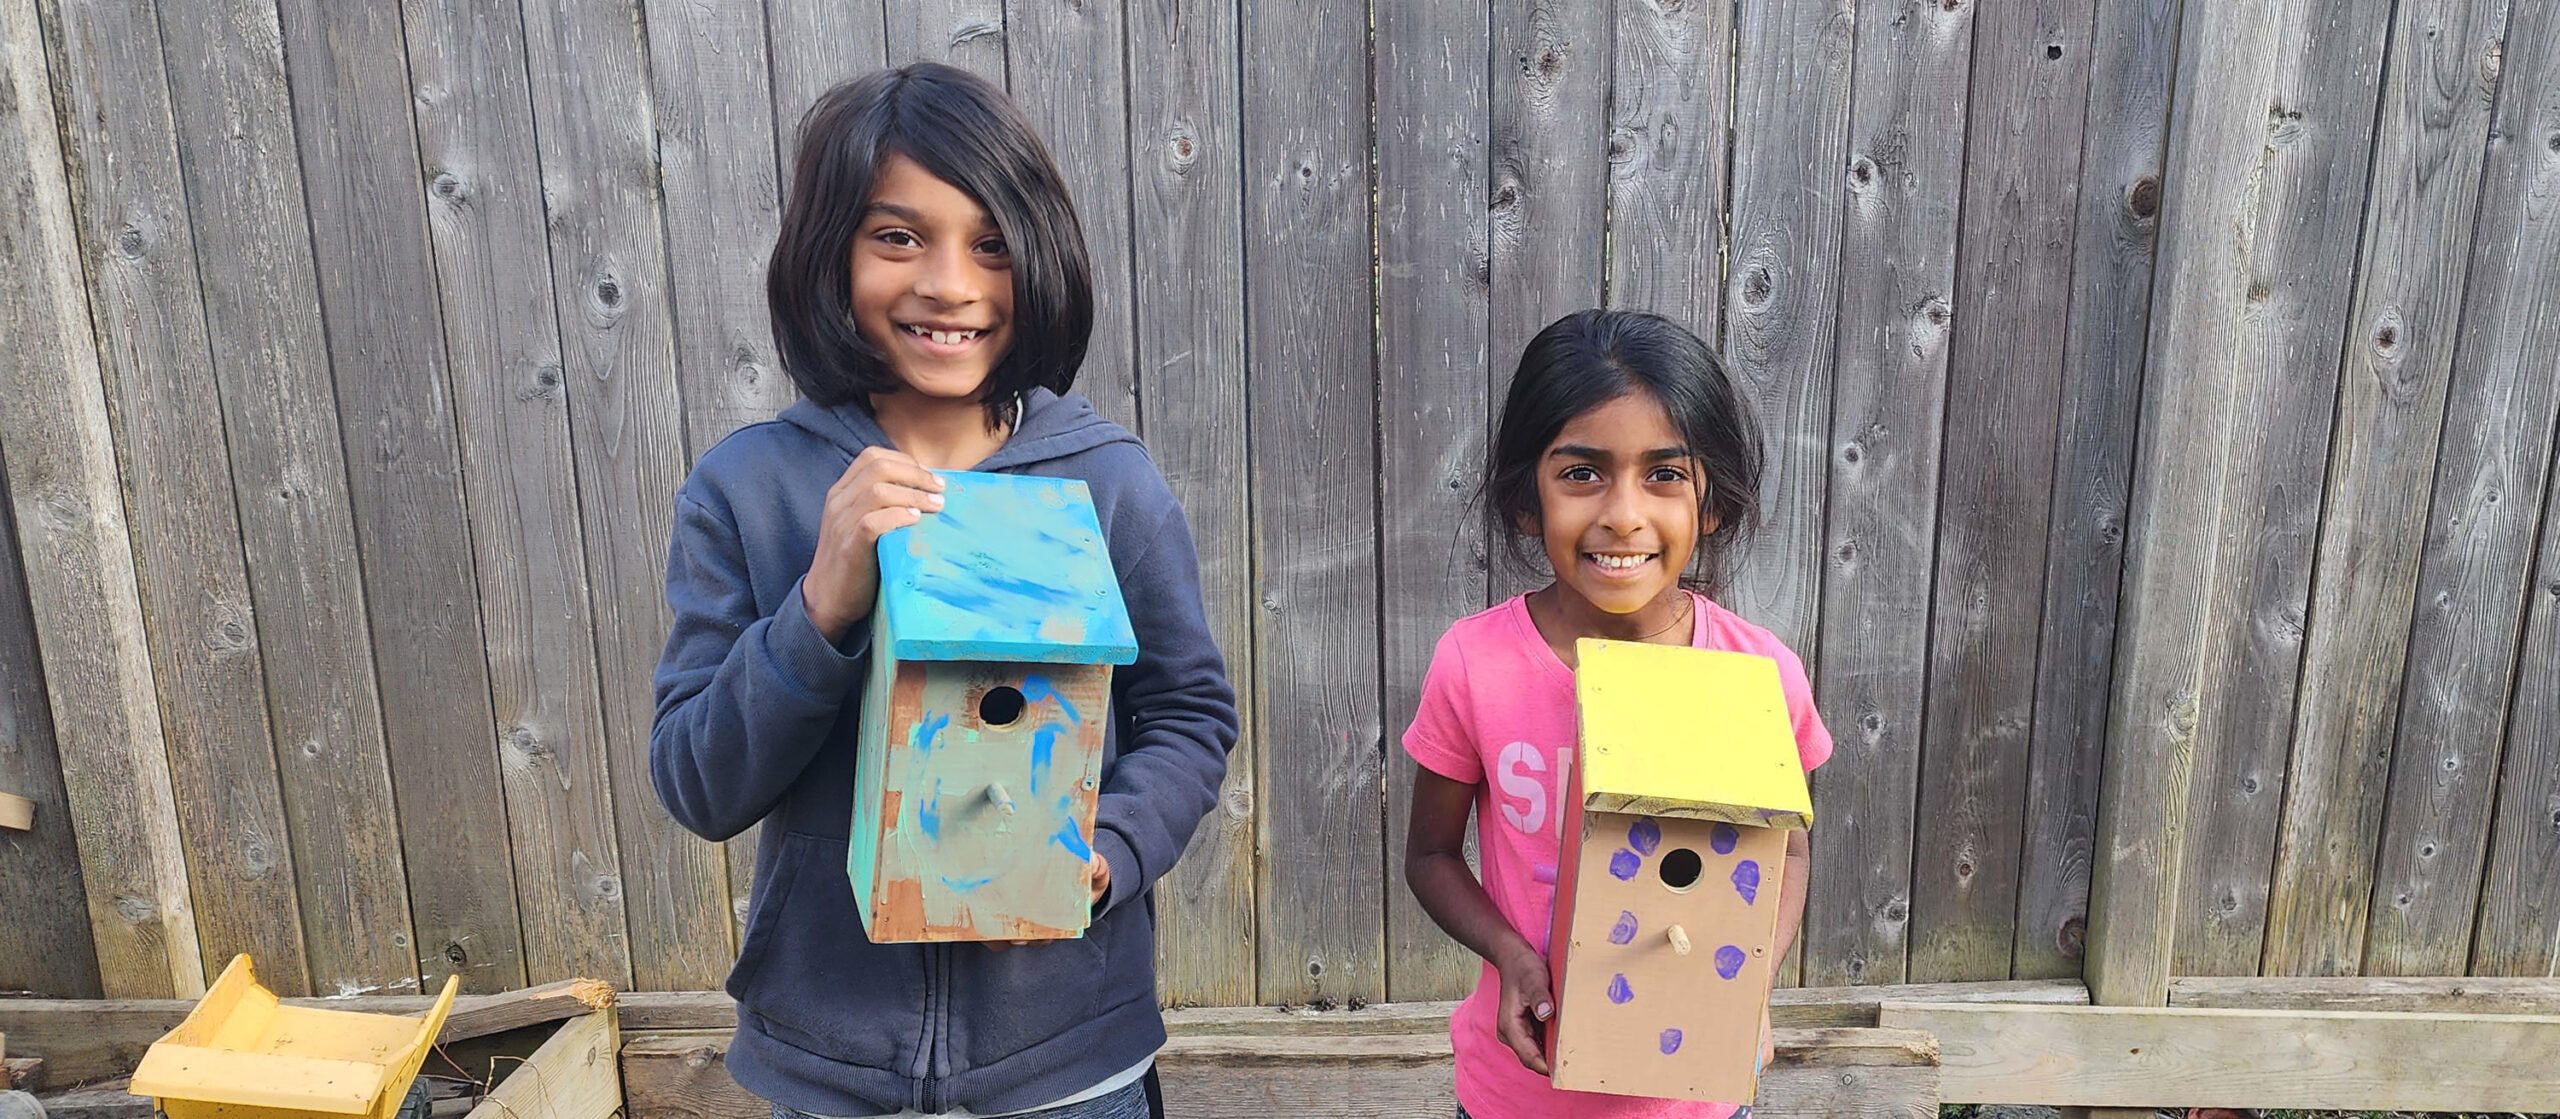
Do you find the idea of peeking into a nest of baby birds so incredibly irresistible? Well these instructions on how to build a birdhouse with a camera for chickadees is going to give you the chance to fulfill that dream, without bothering or scaring the cute baby chickadees! Read on to learn how to build a wooden bird box for chickadees compete with a camera to allow you and your kids to peek in on the little cuties as often as you like.
Table of Contents
How To Build a Simple Birdhouse with a Camera for Chickadees
Download Printables
Download Printables
Download Printables
PRINT IT OUT - MINIMIZE DISTRACTIONS
The print copy of this article includes detailed plans on how to build the Chickadee Birdhouse Project. This will make it a lot easier for you to work on this project without constantly going back to your screen.
Useful Lesson Opportunities From This Project
- Technical skills
- How to read measurements from written plans.
- Taking time to think out your cuts before making them, to minimize material waste.
- ‘Measure twice and cut once’ philosophy.
- Building confidence with small tools like a drill, screwdriver and hammer.
- Science and Nature
- Chickadee nesting habits and requirements
- Concepts of heat retention, ventilation, and drainage.

PROJECT PREVIEW
Project Preview
Project Preview
sneak peek
List of Materials & Tools
Materials Required
- Cedar fence board, 6″ x 48″, 5/8″ thick
- 1″ or 1-1/4″ finishing nails
- Paint (optional)
- 3/8″ wood dowel, 1-1/2″ long (a dowel pin like they sell with ikea furniture would work as well)
- Transparent Acrylic, about 5-1/2″ x 2″ (larger is ok, you’ll need to cut it)
- 4x Adhesive velcro dots
- Wood glue
- 1-1/4″ deck screws
Recommended Tools
- Safety glasses for everyone
- Drill
- 1-1/8″ hole saw
- 3/8″ drill bit
- Hammer
- Screwdriver
- Radial-arm saw
- could also use a jig saw, hand saw, band saw…
- Table Saw
- could also use a jig saw, hand saw, band saw…
- Paintbrushes
Chickadee Birdhouse With A Camera: Building Tips
Before starting this project, there are a few important things you will need to keep in mind when building a bird box for chickadees. Based on these considerations, you can feel free to alter or add to the provided plans to suit your specific situation or material availability.
Did You Know?
Did You Know?
Download Printables
WINTER WARRIORS
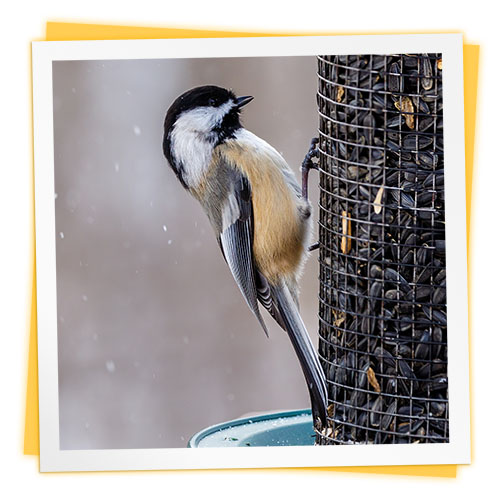
Brrr… Chickadees are tough! They do not migrate during the cold Canadian winters. They do however need over 20 times the food they would normally eat in warmer months. Putting out bird feeders during the winter can really help a chickadee’s chances of surviving the winter months.
A chickadee bird box opening must be 1-1/8" in diameter
The opening for a chickadee bird box should be exactly 1-1/8″ in diameter. Any larger, and predators like house sparrows can get in. Any smaller, and chickadees might not fit through. So if you want chickadees to feel safe in your bird box, don’t change the size of the opening!
It’s also important that the hole be 7 to 8 inches above the floor of the birdhouse, for protection from predators. Some predators may be able to stick their heads into the bird box, and this minimum opening height can keep the baby chickadees out of reach.
Chickadees do not need a perch on the outside. A rough climbing surface on the inside is needed for the fledglings.
Chickadees do not need a perch on the outside of the next box. In fact, some say that a perch can actually make it easier for predatory birds to gain access to the eggs and young. The 1-1/8″ opening of our birdbox however is small enough to prevent most predators from entering the bird box. Those predators small enough to enter a 1-1/8″ opening would not be held back by a missing perch. So I have left it in the plans, and you can decide whether or not you want to include it in your build.
Baby chickadees will need the inside surface of the bird box, just below the opening, to be rough enough that they can climb out of the box when they’re ready to take flight.
Drainage holes at the bottom of the bird box are essential to prevent flooding
During heavy rains, water can get into the birdhouse and collect at the bottom. Drainage holes can help get rid of that water and keep the nest dry.
Chickadee bird boxes need to be cleaned between every brood
It’s important to clean out the birdhouse after every brood to prevent bacteria and mites that can harm the next occupants. Chickadees will generally lay eggs only once per season in early spring, however I have seen chickadees build nests later in the year. So it’s possible your birdhouse may be used more than once over the spring and summer.
Chickadees will never reuse an old nest. In fact, if a pair of chickadees find an old next from a previous brood, they will actually take it apart, flinging bits of nest out the entrance of the bird box.
You can make it easier and safer for them by building a birdhouse with a door that makes it easy to clean between broods. You might be lucky enough to see a second pair use your bird house this season.
The minimum inner dimensions for a chickadee bird box are 4" wide x 4" deep x 9" height.
The inner floor dimensions of the birdhouse are important to consider. They cannot be so big as to make it difficult to retain warmth, but not so small that there is no room for the fledglings to move around, and no room for the mother chickadee to maintain and clean the nest.
Step 1: Cut all pieces to size
Time to complete: 1 hour
First step is to get the wood and acrylic panel cut to the right size. PDF plans that include a cut list and detailed dimensions are provided at the top of the article. To do this right, you’ll need a mitre saw and a table saw. However, you can probably get away with a good jigsaw, or even a hand saw and a little perseverance.

Teachable Moment
Teachable Moment
Download Printables
Planning & Measuring
You can get the kids to participate by having them try to read the plans, and do all the measuring. It’s a great opportunity to teach them the “measure twice and cut once” philosophy.
Another excellent lesson is how to plan out your cuts. All the wood for this bird box can be cut from a single 6″ x 5′ cedar plank. I’ve specified a 6′ plank just to have a little extra in case of a measuring mishap. Get the kids to figure out how to lay out the required pieces on the board to minimize waste.
Step 2: Pre-drill the entrance, drainage, perch and hinge pin holes
Time to complete: 30 minutes
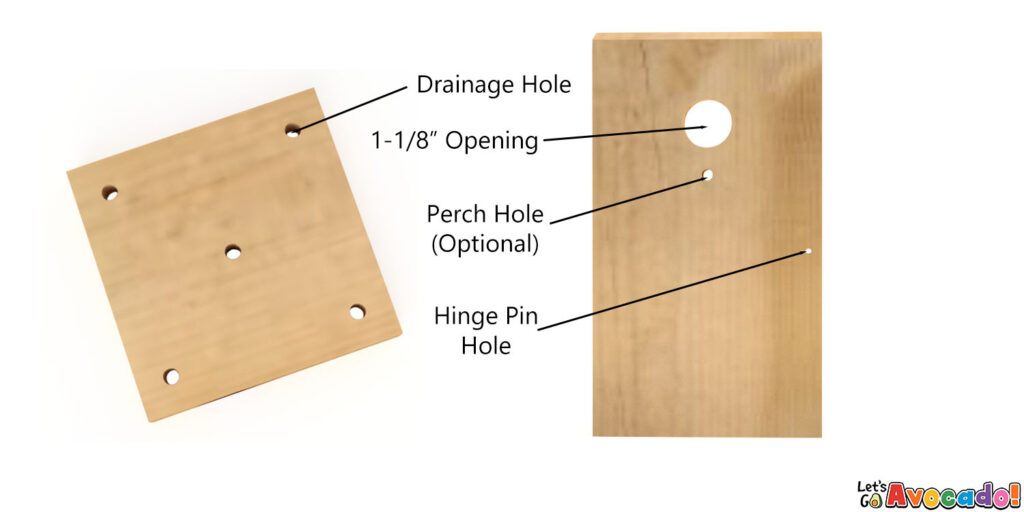
Assembly is going to be a lot easier if you pre-drill all the necessary holes before assembling the parts. Refer to the provided cut list (above) for the correct positioning of the holes.
Step 3: Assemble the pieces
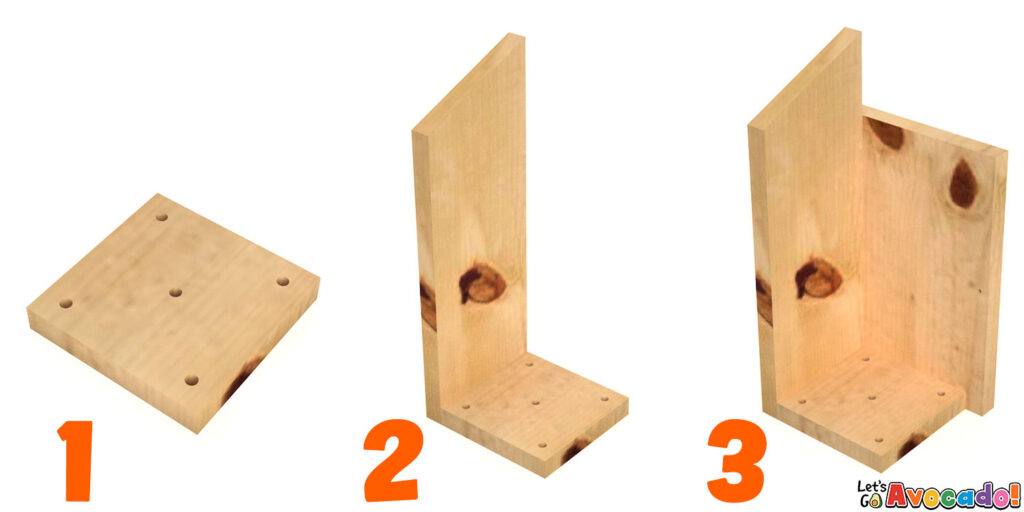
- Make sure to pre-drill hoesl at least 1/4″ in diameter into the base. You can drill several holes here, as you prefer. It can be fun for the kids to do this part, the holes don’t need to be perfect.
- Use some wood glue and nails to assemble the left side of the birdhouse to the base.
- Use wood glue and nails to add the back panel of the birdhouse. Nail it into the base as well as the side. Kids can use a small hammer and finishing nails to do this job. You could hold the nails with a pair of pliers and have them practice their hammering accuracy.

Quick Tip
Quick Tip
Download Printables
Precision Hammering
It can be helpful to get the nails started by hammering the nails into the panels first, until they protrude a little. Then add the glue, and press the panel into place. The protruding nails will help to hold the panel in place while the kids hammer in the nails the rest of the way.
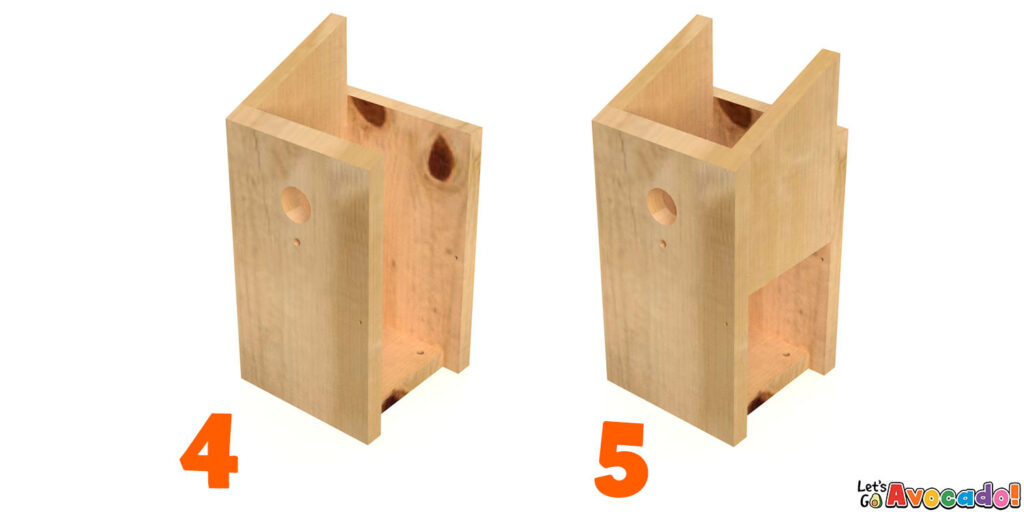
- Continue the assembly with the front panel, using both wood glue and nails.
- Now add the right side top panel, making it flush with the top of the front panel.
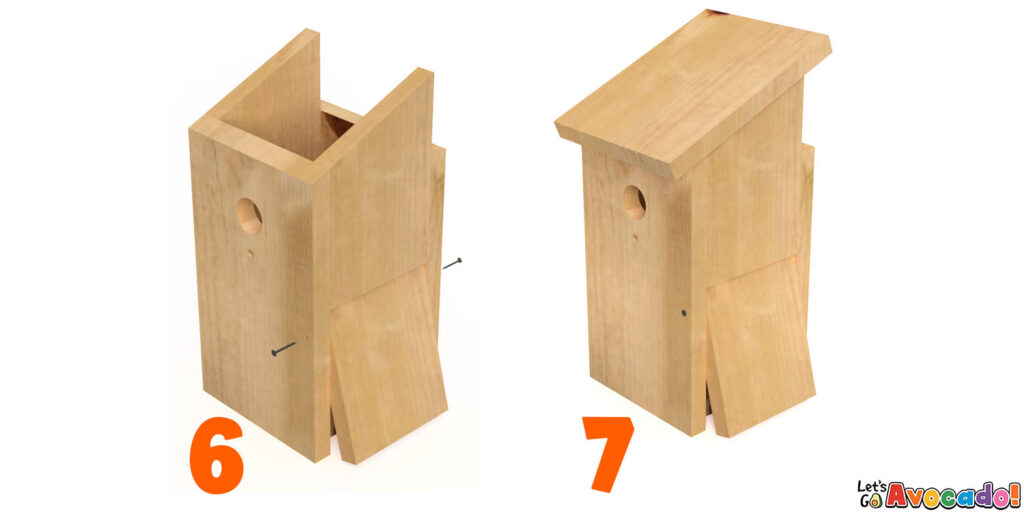
For these next 2 parts, do not use glue!
- Add the bottom part of the right side panel to the birdhouse, but do not glue it. This panel is the cleaning door, and needs to be able to open and close. Once the panel is in place, create a pin hinge by nailing it to the birdhouse using the pre-drilled pin hinge holes in the front and read panels.
- Now attach the roof to the birdhouse using screws, not nails, and do not use glue. Once the roof is attached, If you want to install a camera, unscrew the roof from the birdhouse and attach the camera to the underside of the roof panel, and then reattach the roof panel to the birdhouse using the same screw holes.

Optional
Optional
Download Printables
Birdhouse Nest Camera
Adding a camera to the birdhouse is optional, but if you want to add one, now is the time. After all, this post is about building a birdhouse WITH a camera! The Blink Mini camera available on Amazon is a low cost and decent camera that will meet the requirements for this project. You’ll need to screw it into the roof panel before fixing the roof panel to the birdhouse itself.
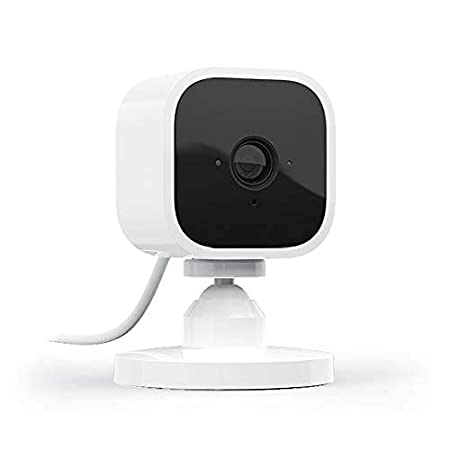
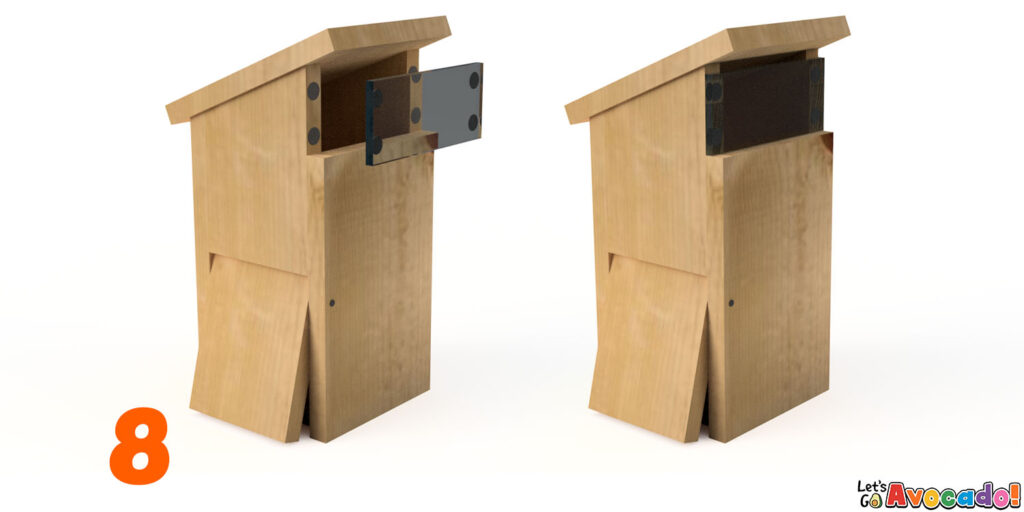
- Once the camera is installed (optional), pass the camera wire out of the opening above the rear panel of the birdhouse. Then add the adhesive hook and loop (velcro) dots to the edges of the side panels above the rear panel of the bird house. Using a staple gun, staple one side of the hook and loop dots to the panel’s edge to prevent them from falling off in the winter. Freezing temperatures can cause the adhesive to fail. Finally, add the other side of the hook and loop dots to the acrylic panel pressing firmly. Now press the acrylic panel in place with the camera wire going above it, through the ventilation gap.
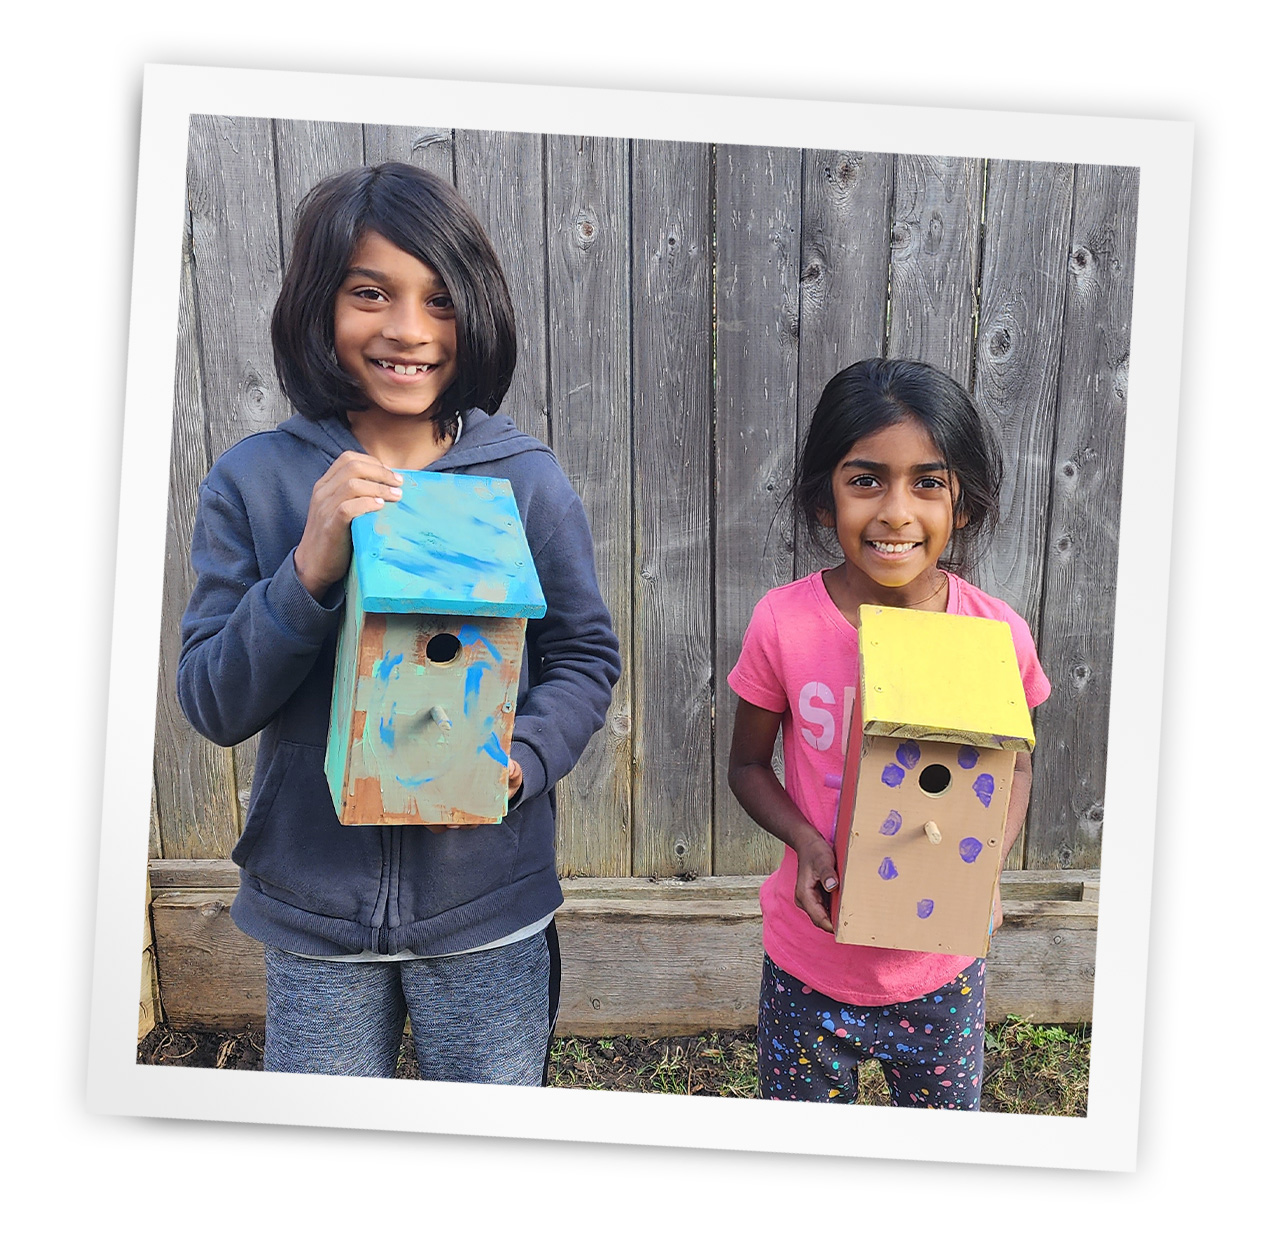
You're Done! Now here are some birdhouse mounting tips.
Congratulations! You’ve finished building your new chickadee birdhouse with a camera. Now, how will you mount it? There are a few different ways to do this depending on your particular mounting situations. You could mount it on a pole, a fence, a gazebo, the side of the house, etc.
Chickadees specifically like nesting sites in an area with trees as opposed to open fields. I chose to install my birdhouse on one of the posts of my gazebo. This allowed me to give my bird box added protection from the rain, and also served to give me an easier way to plug in the camera.
Here are a few other considerations when thinking about where to mount your chickadee bird box.
Place some wood chips at the bottom of the birdhouse
Chickadees will not use the wood chips, but the presence of this kind of floor padding can encourage them to nest in your bird box. Place your bird box in an area that is accessible so that you can clean this bedding between every brood.
Try to install your birdhouse by early March
Chickadees start to build their nest in early march. To increase your chances to have chickadees nesting in your birdhouse, try to install it in early March at the latest. Even earlier is better.
Chickadee birdhouses are ideally placed about 6' to 8' off the ground (1.5m to 2.5m)
In order to attract chickadees to your birdhouse, it needs to be placed around 6′ to 8′ off the ground. Some people have placed them even higher, up to 15′, but I think that would make it challenging to observe them and enjoy your new birdhouse. It would also be a challenge to clean a birdhouse placed so high.
It is also ideal to have your birdhouse facing east. This helps the birdhouse warm up faster in the morning, and prevents direct sunlight from overheating the birdhouse in the summer.
DISCUSSION
DISCUSSION
DISCUSSION
FOLLOW-UP TOPICS
Science Topics
Migration
Fledgling
Predator
Construction Topics
Pin Joint
Measure twice, cut once
Ventilation

There’s a lot to explore right where we are, in our own neighborhoods and backyards! Join us while we get off the couch and explore the everyday wonders of nature, science, space, engineering, art, and anything else we stumble upon during on our adventures.


